Custom Item Textures (Minecraft 1.13 - 1.21.3)
This comprehensive guide will teach you how to create custom textures for items in Minecraft versions 1.13 through 1.21.3 using Custom Model Data and resource packs.
This tutorial does not cover armor retexturing. For armor, you'll need to use OptiFine CIT (Custom Item Textures). Search for "OptiFine armor retexturing" for tutorials on that method.
ALL file and folder names MUST be lowercase only.
Using uppercase characters will cause textures to fail loading. Always use custom_sword instead of CustomSword.
Video Tutorial
If you prefer video format, this tutorial is based on the following video:
Prerequisites
- Text Editor: Use Notepad++, VS Code, or similar (NOT regular Notepad)
- Image Editor: Photoshop, Paint.NET, GIMP, or Paint 3D
- Compression Tool: WinRAR, 7-Zip, or built-in OS compression
- Basic JSON knowledge (helpful but not required)
None of the files you create are .txt files. Make sure your editor can save specific file types like .json, .mcmeta, and .png.
Part 1: Setting Up Your ExecutableItem
Step 1: Create Your Item
First, create the ExecutableItem that will use the custom texture:
/ei create my_custom_pickaxe
Step 2: Configure Basic Properties
Set up the item's display name, lore, and any other features you want:
/ei edit my_custom_pickaxe
Example configuration:
- Name:
&b&lCustom Pickaxe - Material:
DIAMOND_PICKAXE - Lore: Add any descriptive text
Part 2: Creating Your Texture
Step 3: Design Your Texture Image
Create your custom texture using an image editor:
Requirements:
- Format: PNG with transparency support
- Resolution: 16x16 pixels (or power of 2: 32x32, 64x64, 128x128, etc.)
- File name: Use lowercase with underscores (e.g.,
custom_pickaxe.png)
While 16x16 is standard, you can use higher resolutions like 32x32 or 64x64 for more detailed textures. Just keep it as a power of 2.
Save your texture file - you'll need it in the next section.
Part 3: Building the Resource Pack
Step 4: Create Folder Structure
Create the following folder structure:
ExecutableItemsTexturePack/
├── pack.mcmeta
├── pack.png (optional)
└── assets/
    └── minecraft/
        ├── textures/
        │   └── item/
        │       └── custom_textures/
        │           └── custom_pickaxe.png
        └── models/
            └── item/
                ├── diamond_pickaxe/
                │   └── 1.json
                └── diamond_pickaxe.json
Step 5: Create pack.mcmeta
In the root folder, create pack.mcmeta:
{
  "pack": {
    "pack_format": 15,
    "description": "§eExecutableItems Custom Textures"
  }
}
Choose the correct pack_format for your Minecraft version:
- 15 = 1.20.5 - 1.21.1
- 34 = 1.20.2 - 1.20.4
- 18 = 1.20 - 1.20.1
- 15 = 1.19.4
- 13 = 1.19.3
- 12 = 1.19 - 1.19.2
- 9 = 1.18 - 1.18.2
- 8 = 1.17 - 1.17.1
- 6 = 1.16.2 - 1.16.5
See the full pack format list for all versions.
Step 6: Add Your Texture File
- Navigate to
assets/minecraft/textures/item/custom_textures/ - Place your texture PNG file here (e.g.,
custom_pickaxe.png)
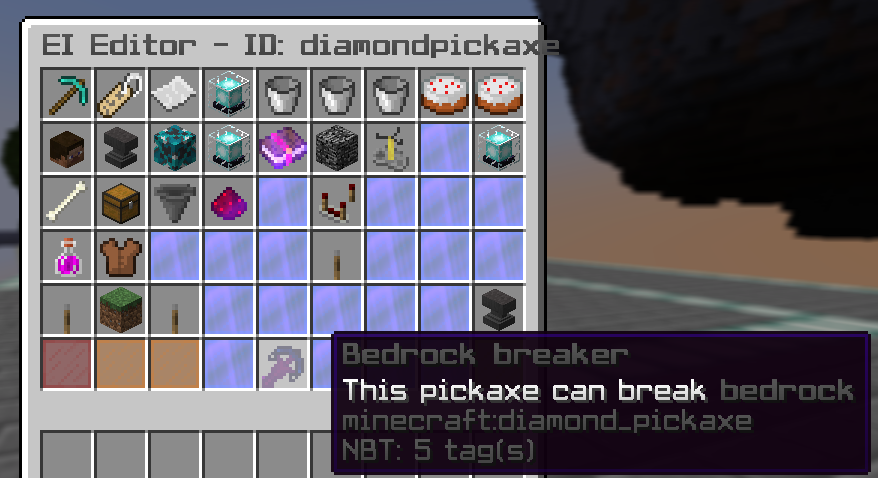
Step 7: Identify the Base Item Material
You need to know the Minecraft ID of the base item:
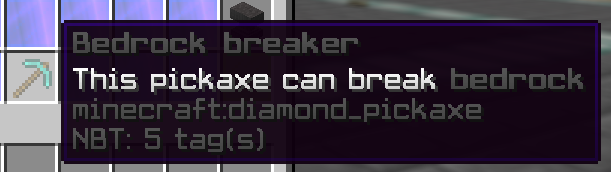
- Press F3 + H in Minecraft to enable Advanced Tooltips
- Hover over the item to see its ID (e.g.,
minecraft:diamond_pickaxe) - Use the part after the colon for file names (e.g.,
diamond_pickaxe)
The file name MUST match the Minecraft item ID, not:
- ❌ Your item's display name
- ❌ Your texture file name
- ❌ Your ExecutableItem ID
- ✅ The Minecraft material ID (e.g.,
diamond_pickaxe)
Step 8: Create the Base Model File
In assets/minecraft/models/item/, create diamond_pickaxe.json:
{
    "parent": "minecraft:item/generated",
    "textures": {
        "layer0": "minecraft:item/diamond_pickaxe"
    },
    "overrides": [
        {
            "predicate": {
                "custom_model_data": 1
            },
            "model": "item/diamond_pickaxe/1"
        }
    ]
}
Understanding the fields:
"parent": Base model type- Use
"generated"for most items - Use
"handheld"if item looks wrong when held
- Use
"layer0": Default vanilla texture"overrides": Array of custom model data mappings"custom_model_data": The number you'll set in ExecutableItems"model": Path to your custom model file
To add more custom textures for the same item, add more override entries:
"overrides": [
    {
        "predicate": {
            "custom_model_data": 1
        },
        "model": "item/diamond_pickaxe/1"
    },
    {
        "predicate": {
            "custom_model_data": 2
        },
        "model": "item/diamond_pickaxe/2"
    },
    {
        "predicate": {
            "custom_model_data": 3
        },
        "model": "item/diamond_pickaxe/3"
    }
]
Step 9: Create the Custom Model File
- Create folder:
assets/minecraft/models/item/diamond_pickaxe/ - Create file:
1.jsoninside that folder
Content of 1.json:
{
    "parent": "item/handheld",
    "textures": {
        "layer0": "item/custom_textures/custom_pickaxe"
    }
}
Understanding the texture path:
The "layer0" value is a path relative to assets/minecraft/textures/:
- Path:
item/custom_textures/custom_pickaxe - Full path:
assets/minecraft/textures/item/custom_textures/custom_pickaxe.png
The most common mistake is setting the wrong path in layer0. Double-check that:
- The path matches your folder structure
- You don't include
.pngextension - The path starts from inside the
textures/folder
Step 10: Package the Resource Pack
For Windows (WinRAR/7-Zip):
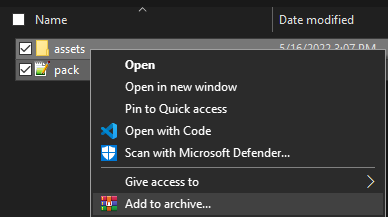
- Select
pack.mcmetaandassetsfolder - Right-click → Add to archive / Compress
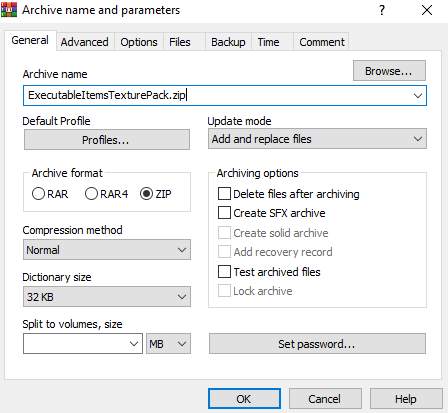
- Choose
.zipformat - Name it
ExecutableItemsTexturePack.zip
For Mac/Linux:
- Select
pack.mcmetaandassetsfolder - Compress to ZIP using built-in compression
- Or place in a folder and use as-is for local testing
Step 11: Install the Resource Pack
- Place the
.zipfile in.minecraft/resourcepacks/ - Launch Minecraft
- Go to Options → Resource Packs
- Enable your pack by clicking the arrow
Part 4: Connecting ExecutableItems to the Texture
Step 12: Set Custom Model Data
Edit your ExecutableItem:
/ei edit my_custom_pickaxe
Navigate to the customModelData configuration and set it to match your override:
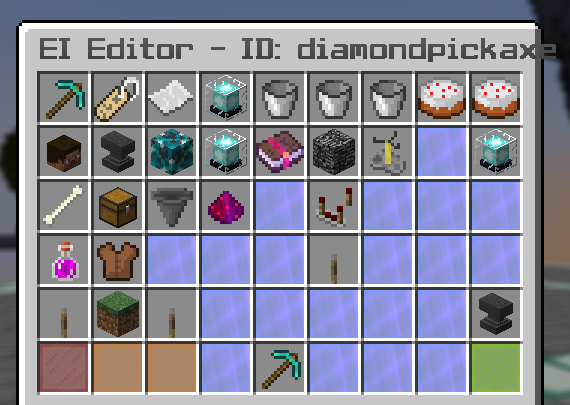
Set the value to 1 (or whatever number you used in the override):
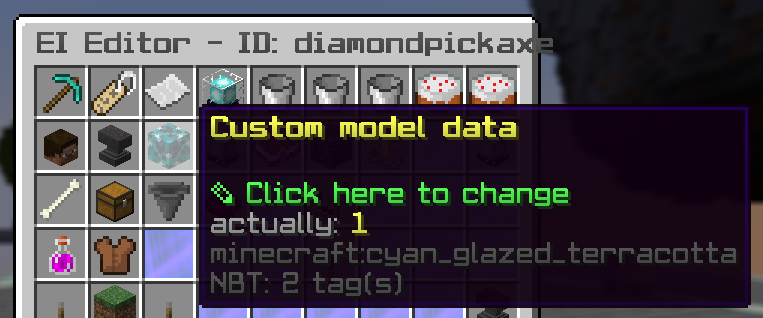
In the config file, it looks like:
customModelData: 1
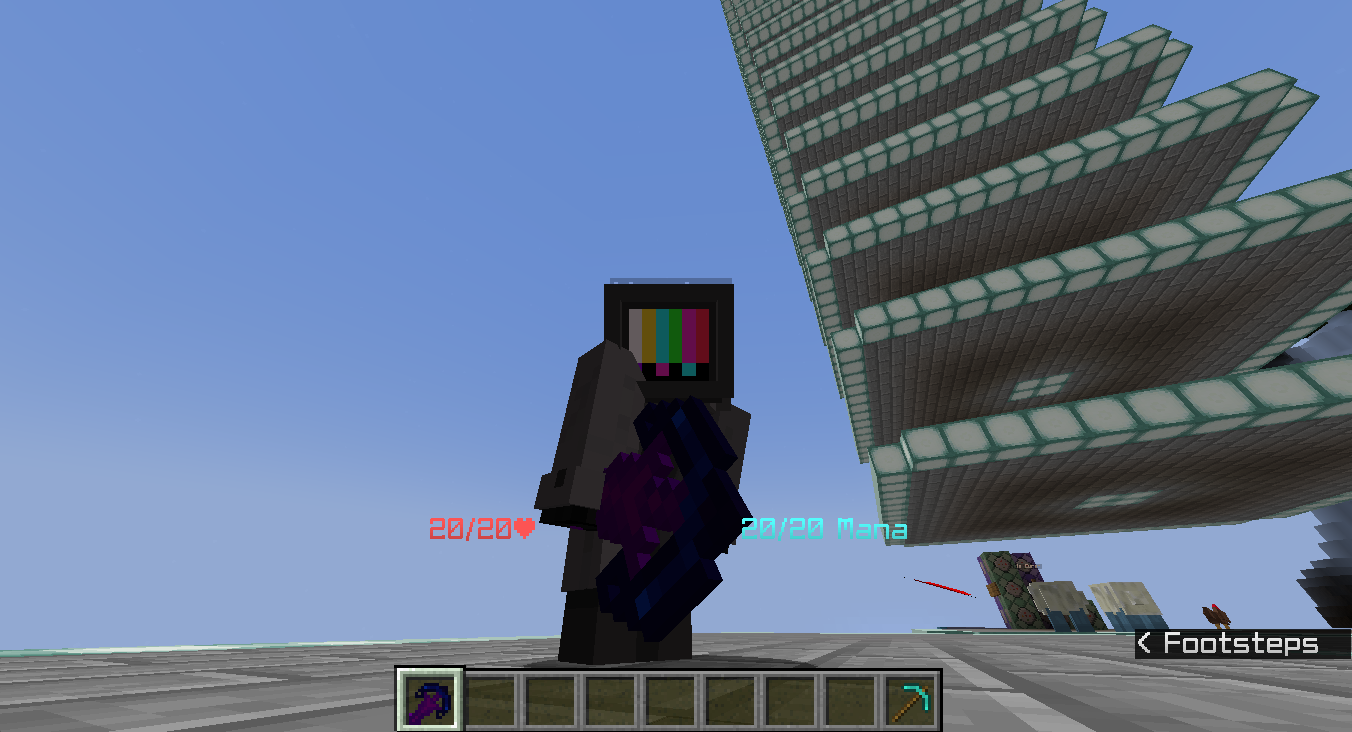
Step 13: Test Your Custom Texture
Give yourself the item:
/ei give my_custom_pickaxe
You should now see your custom texture!
Troubleshooting
| Problem | Solution |
|---|---|
| Texture not showing | Check that file names are all lowercase |
| Purple/black texture | Verify the layer0 path matches your texture location |
| Pack not loading | Check pack_format matches your Minecraft version |
| Wrong item appearance | Change "generated" to "handheld" in the model parent |
| Item looks vanilla | Verify customModelData in EI matches your override number |
Advanced Tips
Organizing Multiple Textures
Create subfolders for different item types:
custom_textures/
├── weapons/
│   ├── sword_fire.png
│   └── sword_ice.png
├── tools/
│   └── pickaxe_emerald.png
└── misc/
    └── wand_magic.png
Update your paths accordingly:
"layer0": "item/custom_textures/weapons/sword_fire"
Using 3D Models
For 3D models created in Blockbench:
- Create your model in Blockbench
- Export as "Java Block/Item"
- Replace the content of your
1.jsonwith the exported model - Make sure texture paths match your pack structure
Server Deployment
To use custom textures on a server, you'll need to host the resource pack online. See our Uploading Texture Pack Guide for instructions.
Download Example Pack
If you're having trouble following the steps, download this example pack to see the correct structure:
Download ExecutableItemsTexturePackExample.zip
Additional Resources
- Minecraft Wiki: Resource Pack
- Minecraft Wiki: Model Format
- Pack Format Version History
- Blockbench - Free 3D Model Editor
Need help? Join our Discord community and ask in the support channels!